Use the following URL to navigate to the login window: <insert url here once we get that...>

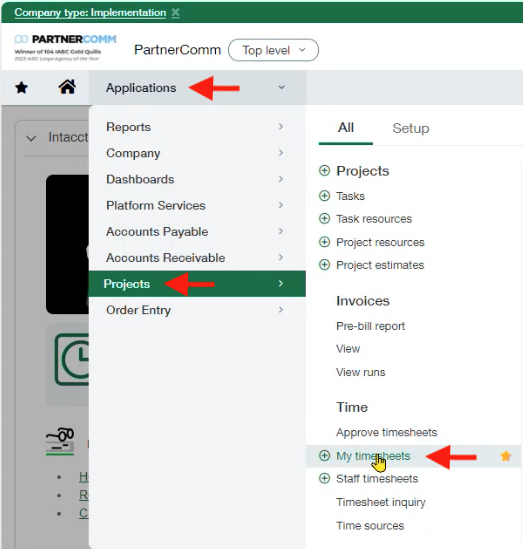
- At the Home page, click on "Applications"
- Select "Projects" from the drop down menu
- Then click on "My timesheets" under the "Time" section
- On the next page click on the "Add" button at the top right of the screen

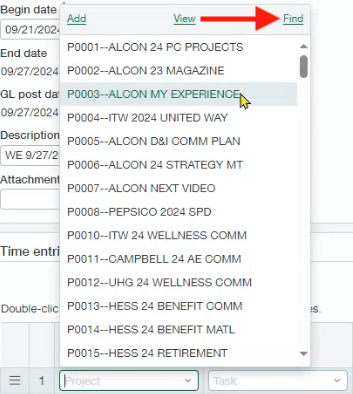
- Look for the "Description" field, you'll need to enter "WE MM/DD/YY" this will be the Week Ending date for that specific timesheet

- Click into the "Project" field below, in the "Time entries" section and select the proper project. If you dont see the project showing in the default list, you'll click the "Find" option in that menu to bring up a search window
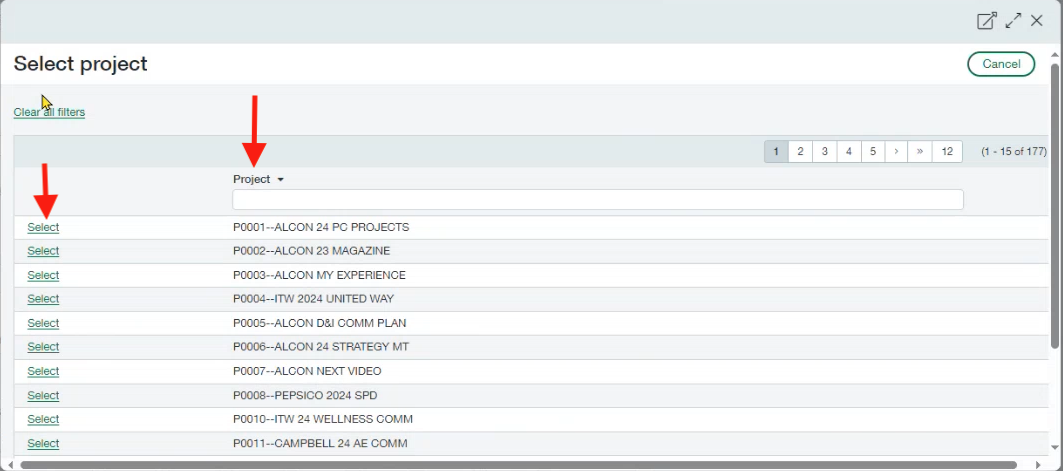
- On the new "Select project" window, you'll search for your project by clicking into the Project field and begin typing your project name. Reminder: this search is case sensitive
- After you find the project you're looking for, you'll click the "Select" option
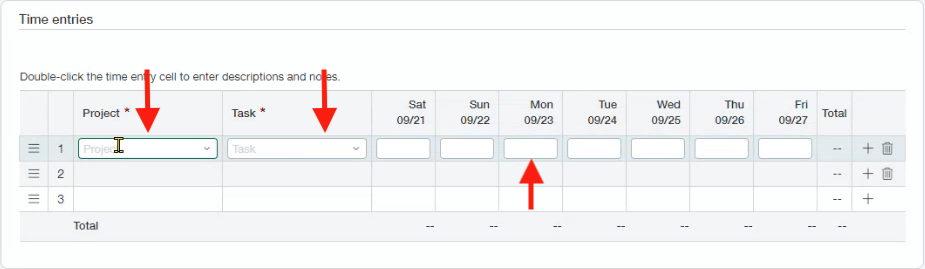
- Then, back at the timesheet, click the "Task" field to add the task that your selected project has available. This has a similar "Find" option but the search menu is limited to the tasks that are apart of that specific project.
- Directly to the right of the newly added "Project" & "Task" you can enter in the number of hours worked
- Click on the time you just entered and a new window will popup for you to enter in some new information. Specifically, you'll need to enter what you would have normally put in the old timesheets description field into the "Notes" field then click "Done"
 IMPORTANT: these notes entries will typically appear on invoices that clients receive
- Once you've completed entering all your projects, tasks, hours, and notes you'll click on the "Draft & Continue" button or drop down if you want to use one of those options

- Choosing the "Draft" option will take you to your "My Timesheets" page where you can see any timesheets you've created
- If you need to edit your timesheet after you've already hit "Draft" you can simple use the "Edit" button to the left of the timesheet line item. This can only be used while your timesheet is in the draft state, which you can identify by looking at your timesheets "State" column

- Now that you've entered all of your time (with your notes) for all of your projects/tasks for the week, you'll click "Submit" directly to the right of the "Draft & continue" button/drop down
- Your timesheet will submit and you'll be taken back to your "My timesheets" page, you'll notice that the "State" column has changed to show "Submitted"
- After submitting, if you need to make an adjustment to that timesheet you can click the "Recall" option to bring your timesheet back and allow you to use the "Edit" option again

Was this article helpful?
That’s Great!
Thank you for your feedback
Sorry! We couldn't be helpful
Thank you for your feedback
Feedback sent
We appreciate your effort and will try to fix the article